In this article you will learn about:
Registering a Patient
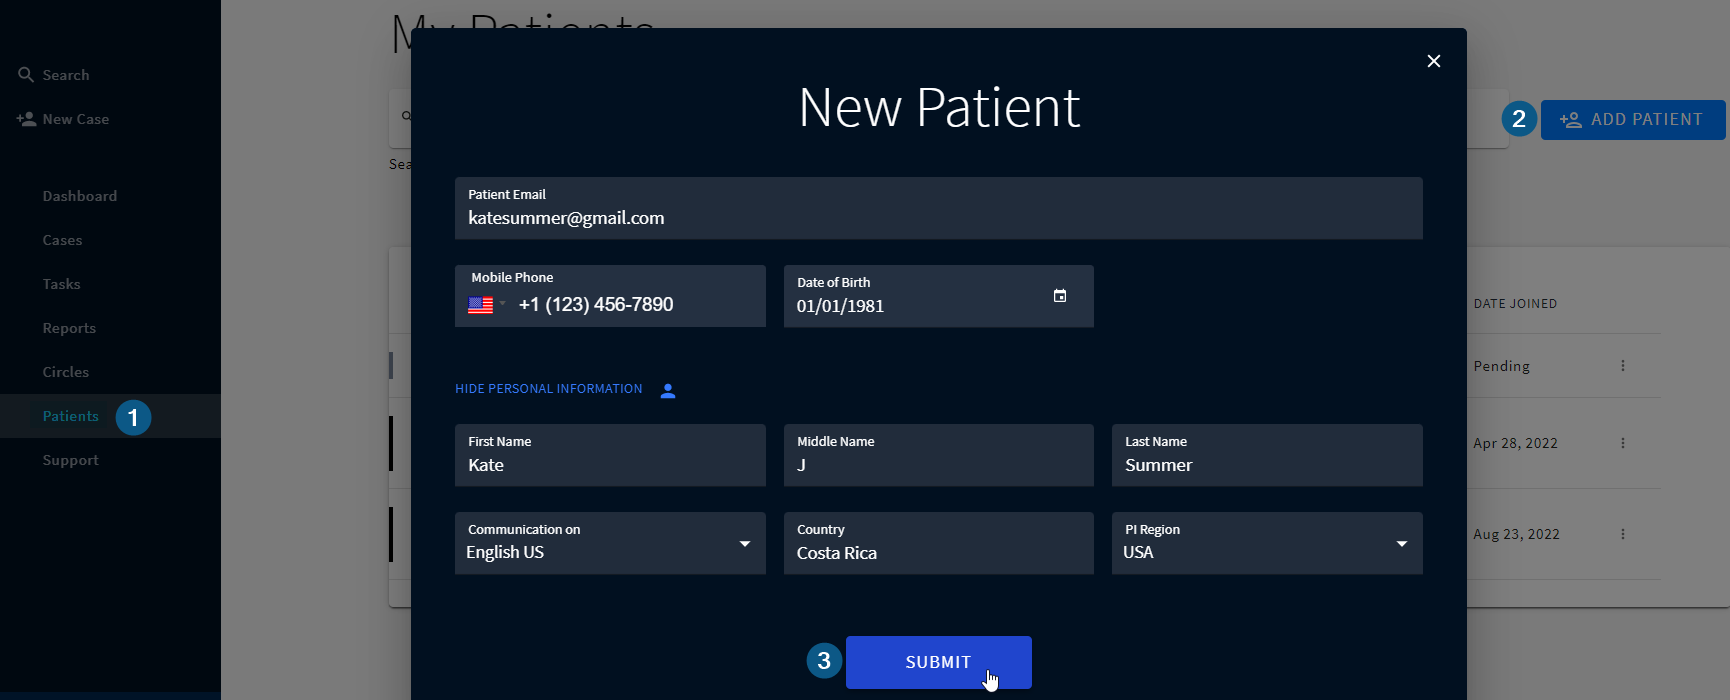
1. Select Patients in the navigation bar on the left
2. Click +ADD PATIENT at the top right of the screen
3. Enter the patient's contact information and click SUBMIT, and the patient will immediately receive an email invitation to sign up for the Personal Patient Portal.
Please make sure that the patient email address is correct. Otherwise, it will be marked as bounced and the patient won’t get any emails.
To fill in more info about a new patient, click SHOW PERSONAL INFORMATION, where you can provide patient's first/middle/last name, PI Region, and preferred language of communication* .
*The patient will get an invitation email on the language you selected. However, the patient portal will open in the browser language set on the patient’s device. Additionally, they have the ability to change the language of the interface directly in the personal patient portal settings.
Registering a Patient with no Information
You can add a patient without providing any information about them. In this case, after adding them to the system the patient will have only their Patient ID which can be used for future case creation.

Pending Patients
You can monitor whether a patient successfully enrolled or not and resend them invitations if required.
You can also add a new patient directly while creating a new case.